

Create Salesforce leads, cases, contacts, and more when someone answers your typeform
By:Typeform
With the Typeform app for Salesforce, you can automatically create leads, accounts, opportunities, contacts, or cases in Salesforce from typeform responses.
Start the conversation in style with Typeform, then get the data into Salesforce so your team can follow up fast.
Ideal for Sales and Customer Support teams.
What you need:
- A Typeform Business account
- A Salesforce account (and your Salesforce admin to install the app)
To install the Typeform app in your Salesforce account, you'll need:
- A Typeform Business account
- A Salesforce account with admin rights
That bit about admin rights is important. If you're not the admin of your Salesforce account, you'll need to contact them to complete the installation.
INSTALLATION
- Log into your Typeform account and open any published typeform.
- Go to the Connect area and hit 'Connect' on the Salesforce integration.
- You'll be given an installation link. Copy and paste it into your browser to start the installation. If you don't have admin rights in Salesforce, speak to your account admin and have them follow the installation link.
- Proceed with the installation. You'll have to choose who in your Salesforce account to give access to, and give access permission to Typeform's API.
APP SETUP
- In Salesforce, go to the App Launcher and choose Typeform.
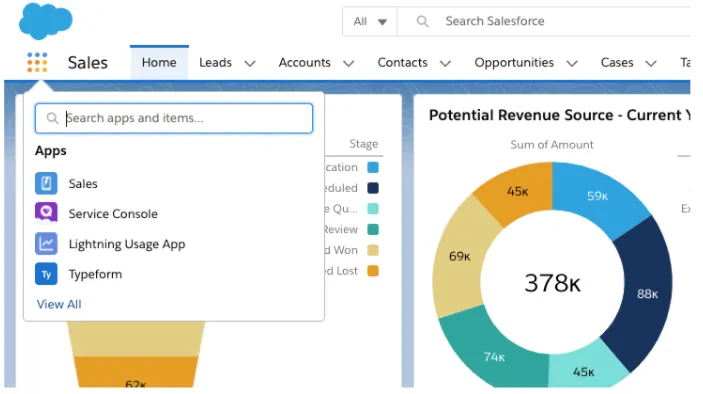
- You'll see 3 main tabs in the app: Admin, Forms, and Errors. Go to the Admin tab, and hit the button that says Get Started.
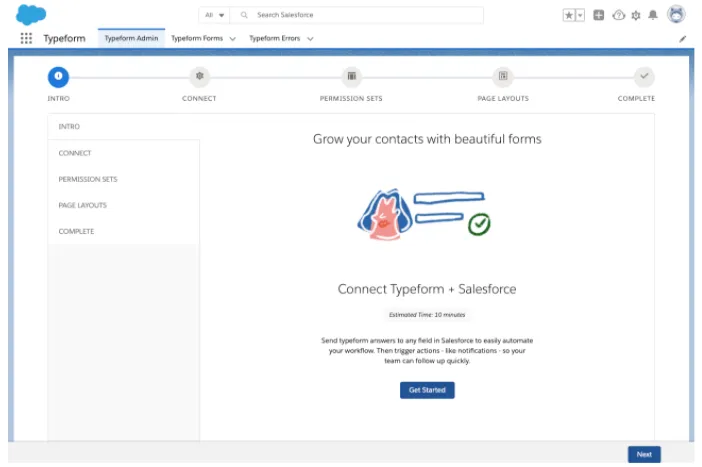
- Next, you'll be asked to choose which Typeform organization to link to Salesforce. You can only choose one, so make sure all the typeforms you want to link to Salesforce are in the same organization in Typeform.

- A popup will appear asking you to log in to Typeform. Enter your credentials to log in, and hit Accept to give Salesforce access to your Typeform account.
- We're getting there! Now, look at the Schedule section. Here's where you can set how often Salesforce retrieves data from Typeform. There are two settings:
- Retrieve Forms. This sets how often Salesforce checks your Typeform account to retrieve and update typeforms in your organization.
- Refresh Responses. This sets how often Salesforce checks your typeform responses and sends the data to Salesforce.
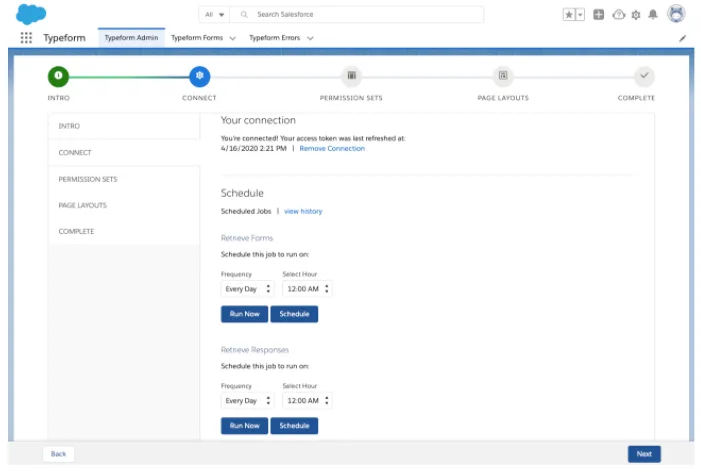
To update everything now, click Run Now. Then define your update schedule—we'd recommend hourly or daily, depending on your needs. Enter your info, then hit Schedule.
MAPPING TYPEFORMS TO SALESFORCE
The last step is to map specific typeforms to Salesforce objects.
- Go to the Typeform Forms tab in Salesforce. This is where you can see all the typeforms you can link to your Salesforce account.
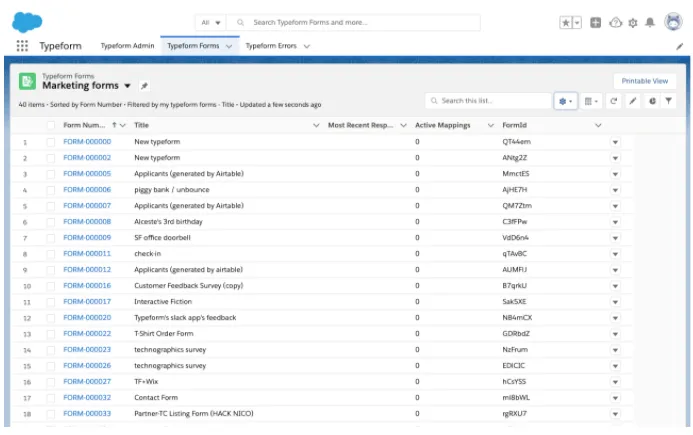
If you've already mapped typeforms to Salesforce, you'll see and edit them here.
- To create a new mapping, choose a typeform to open, and click on New Typeform Mapping.
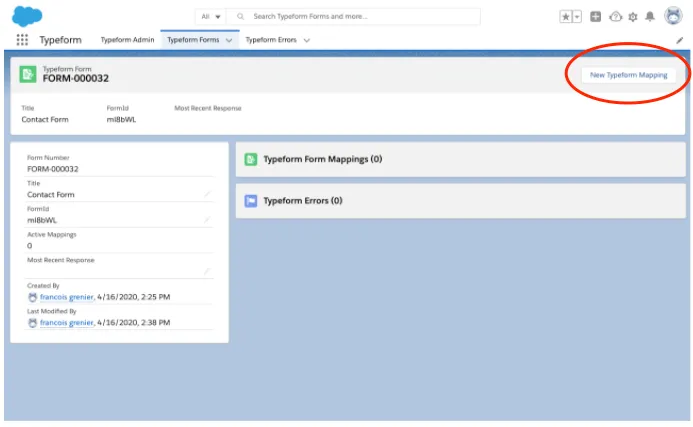
- Now select a Salesforce object to map your typeform responses to. Choose from Account, Case, Contact, Lead, or Opportunity. Then hit the Save & Create Mappings button.
- For our example, we'll choose to create a new 'Lead'. You'll see a list of questions in your typeform that you can map to fields in Salesforce. Leads in Salesforce need a last name, email address, and company, so remember to make sure your typeform asks people for that info.
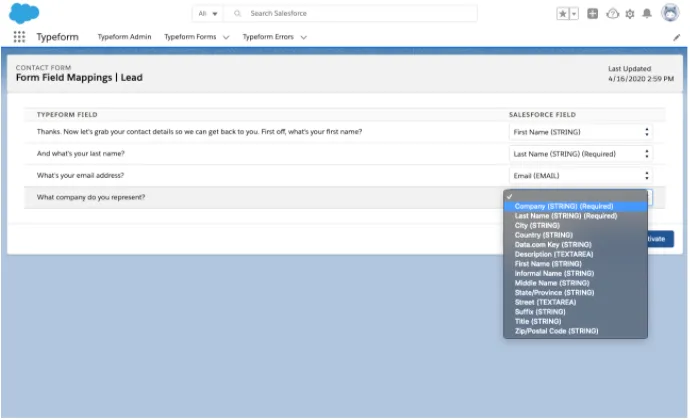
- Once you've mapped all the relevant fields, hit Save & Activate.
And you're done! New typeform responses will be added as leads in Salesforce every time the data is refreshed (as defined during setup).
Make interactive forms, surveys, quizzes, and more
Engage your audience → get better data