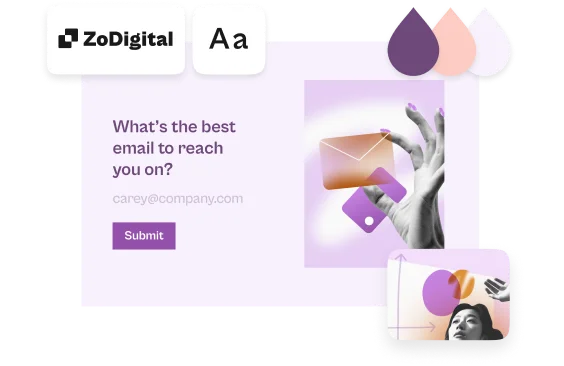
Apply a theme to your form
You can apply themes from Typeform’s theme gallery to your forms. You can also design and manage your own repository of custom themes.
A theme consists of:
- A color palette with the color values of the main elements of a form: questions, answers, buttons, button text, and background.
- A font for the text.
- A background image (optional), including brightness and scaling configuration.
- A brand logo (optional), available on Plus or above plans.
If your account is on a Plus plan or above, you can also use brand kits to create consistent themes to use on forms across your organization. Learn more here.
Create your own custom themes
To create custom themes, follow these steps:
1. Open your form in the Create panel and click on Design in the right-hand sidebar. Click the + sign next to Themes.
2. By default your new theme will be named My theme. Click on My theme to rename your theme.
3. Click the System font dropdown to select a font for your theme. You can learn more about fonts in Typeform here.
4. Now select the color scheme for your theme. You can select separate colors for question text, answer text, buttons, button text, and the form background.
Click on the color droplet menu icon and pick a color from the palette or insert a hex value.
5. If you’d like to use a background image instead of a solid-color background, click the + button next to Background img. There’s more information on adding background images here.
6. If you'd also like to add your brand's logo to your theme, click Add next to Logo. You can read more about adding your brand logo to a form here.
You can also use the Logo alt text field to add information to describe the logo image to people with visual impairments. Read more about creating accessible forms for your respondents here.
Additionally, you can change the size of your logo by clicking Lg, Md, or Sm and selecting left, middle, or right alignment for the placement of your logo.
7. Next, under Rounded corners, you can choose the shape that best matches your brand to be applied to buttons and other elements.
Here are some Picture Choice options with the least rounded corners.
In this Multiple Choice question, the corners are a bit more rounded.
Here's an Opinion Scale question with the most rounded corners.
Keep in mind that the Rounded corners setting also applies at the form level, so the shape chosen here will apply to every question across your form.
8. Finally, you can set the size and alignment of your text for the Welcome Screen, Endings, and questions:
9. Once you’re happy with your settings, click Save as new theme.
10. You can now access your saved theme and apply it to any form by going to the My themes tab. Click a theme to apply it to your form.
If you copy or move the form to another account, the theme will also be transferred.
Editing, duplicating and deleting your custom themes
Clicking the three-dot icon next to any theme gives you the option to rename, edit, duplicate, or delete your theme.
When editing a custom theme, you’ll need to either save the changes you’ve made or revert back to the original version.
Editing and resaving a custom theme does not create a new copy of the theme. Once you’ve saved edits on a custom theme, you won’t be able to access previous versions of that theme. To save a copy of the original custom theme, duplicate it and make edits on the duplicate version.
Additionally, if you edit a custom theme, this theme will change for all forms that use it. We’ll warn you if other forms use the theme, and you can choose to proceed with editing or duplicating your theme instead.

Warning! If you choose to delete a theme that's also used in your other forms, the theme will be removed from all of your forms, including the ones that have already been published.
Theme gallery
To view the gallery of Typeform-designed themes, click Design in the right-hand sidebar, then the Gallery tab. You’ll see a list of themes and can preview the font and color scheme of each. Click on a theme to apply it to your form.
You can edit the font, color scheme, and background image of these themes by clicking the three-dot icon on the theme card. When you save edits on a theme from the gallery, a new custom theme will appear under the My themes tab. A default version of the theme will remain accessible in the Gallery tab.
Themes marked ‘Premium’ can be applied to forms on Plus accounts and above.
If you are on a Free or Basic plan, you can test out how Premium themes look on your form, but you’ll have to remove the themes before you can publish the form.
If you have a Plus account or above, you can edit Premium themes using the three-dot icon.
Save a theme from a copied form to your own account
If you've copied a form with a custom theme from another Workspace, you can save that theme to your own account with a small workaround.
Open the form that was copied to your Workspace. In the Create panel, open the Design tab.
Scroll to the bottom of the My themes tab. You should see the theme used in the form.
Click the three-dots menu on the theme card, then Edit.
Use the theme design options to edit the theme, such as changing its brightness or color. Any change, no matter how small, will work.
Once you've finished, click Save as new theme at the bottom of the Design tab.
The new theme will now be visible at the top of the list under My themes.
The old theme will be accessible at the bottom of My themes for the copied form only, so you can change back to that theme if you like. When you edit another form on your account, the old theme from the copied form won't appear in the list. The new, nearly-identical theme you created will still appear, and you'll be able to apply it to other forms.


